lesson 4: coronal perforation
Lesson 4: Coronal perforation
This lesson explains coronal perforation, its common sites, its effect on prognosis, and the full clinical steps for management.
Coronal perforation
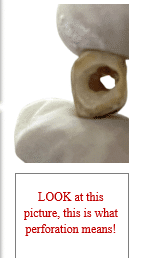
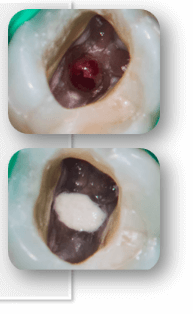
Coronal perforation means accidental mechanical communication between the pulp chamber and external PDL or outer of the tooth during access cavity preparation.
The crown has been perforated ( a hole in the tooth).
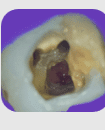
Common locations: furcation, buccal/lingual walls.
Common Sites of Coronal Perforation
- Furcation area of molars
- Buccal or lingual walls of pulp chamber
- Cervical third of crown or root
- Allowing bacterial contamination of periodontium.
- Leading to attachment loss, inflammation, and treatment failure.
- Increasing risk of persistent pain or post-op complications.
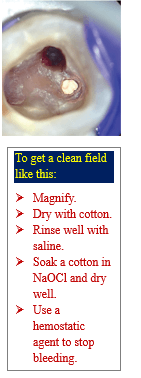
- Stop drilling immediately if you see unusual bleeding.
- Optional inspect visually using magnification (dental microscope or 3.5 X loupes).
- Dry the area gently with sterile cotton pellets to locate the perforation site.
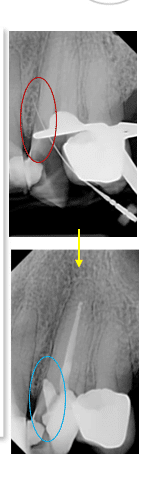
- Confirm with a periapical radiograph to identify the location, size and depth of perforation.
- Isolate the tooth with a rubber dam to avoid contamination.
- Gently irrigate using:
- 2.5–5.25% sodium hypochlorite (NaOCl) for disinfection.
- Saline or sterile water to rinse residual NaOCl
- Avoid pressure irrigation to prevent naocl extrusion.
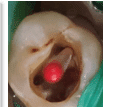
- Apply light pressure with a sterile cotton pellet or a paperpoint soaked in:
- 1:1000 epinephrine for hemostasis
- Wait 1–3 minutes to see if bleeding stops.
- Persistent bleeding indicates possible larger injury (large perforation).
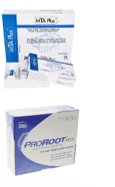
- Use premeasured MTA powder (e.g., ProRoot MTA, MTA Plus).
- Mix with sterile distilled water or the provided liquid:
- Ratio: 3:1 powder to liquid
- Consistency: moist putty (non-gritty, cohesive ball)
- Mix on glass slab or mixing pad with a stainless spatula
- If using premixed bio-ceramic putty (e.g., EndoSequence BC RRM), skip mixing (it is much easier).
- Dry the perforation site with a sterile paper point.
- But do not over-dry — MTA needs slight moisture.
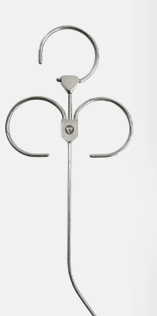
- Insert MTA using:
- Map system (micro apical placement).
- Carrier gun.
- Amalgam carrier + fine condenser.
- Place small increments (1–2 mm).
- Gently condense with a plugger or micro-condenser.
- Ensure that:
- There are no voids.
- The material is flush with the chamber wall or furcation floor.
- No extrusion occurs into the sulcus or periodontium
- Place a moist cotton pellet directly over the MTA.
- Seal the access with a temporary filling.
- Let MTA set for at least 24 hours (setting time = 2 hours minimum, ideally overnight for strength).
- Apply MTA then apply temporary filling over it.
- After 24 hours apply glass ionomer, composite restoration, and make a crown.
- Some modern MTA formulas set faster (set in 15–30 minutes)
- For example:
- MTA Repair HP.
- MTA Angelus Fast Set.
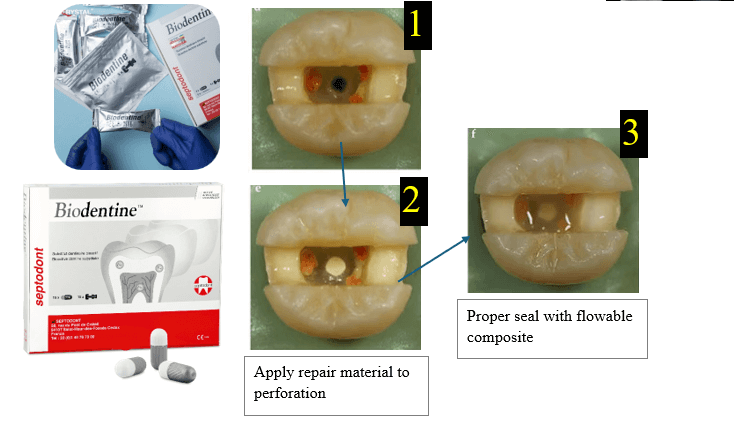
- There is Biodentine, which is better and fast setting.
Compromises tooth prognosis by
clinical tips for managing coronal perforation
Step 1: start quickly
Step 2 and Step 3
Step 2: clean the perforation site
Step 3: control bleeding
Step 4 and Step 5
Step 4: Prepare MTA
Step 5: put MTA into the perforation
Step 6: Provide Moisture for Setting
Important sequence
Apply MTA, cover it with a temporary restoration, wait for proper setting, then complete the definitive coronal restoration.
↑